
Step 1: Enable Safari Developer Menu
- Open Safari
- Go to Safari → Settings… (or Preferences on older macOS versions)
- Click the Advanced tab
- Turn on:
- Show features for web developers (macOS Sequoia and later)
- or Show Develop menu in menu bar (older macOS versions)
- You should now see Develop in the Safari menu bar
Step 2: Enable Office Developer Extras
-
Open Terminal
- For Microsoft Word, execute the following command in Terminal:
- defaults write com.microsoft.Word OfficeWebAddinDeveloperExtras -bool true
- defaults write com.microsoft.Word OfficeWebAddinDeveloperExtras -bool true
Step 3: Open the Web Inspector
- Open a word document with Decisions Document Manager
- Generate PDF and select Send for Signature
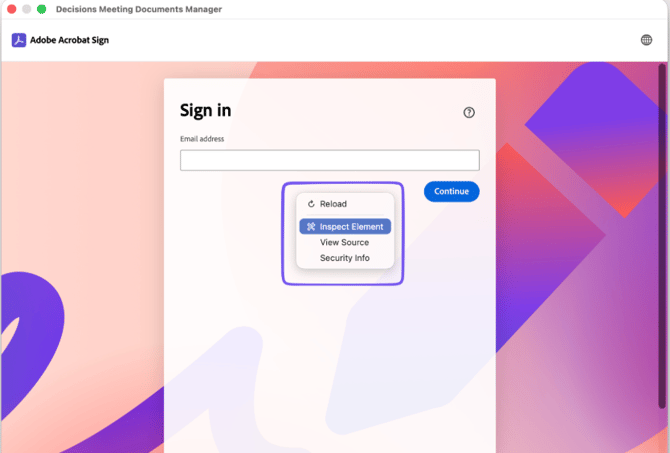
- Once loaded, right click and select Inspect Element
Step 4: Disable Cache
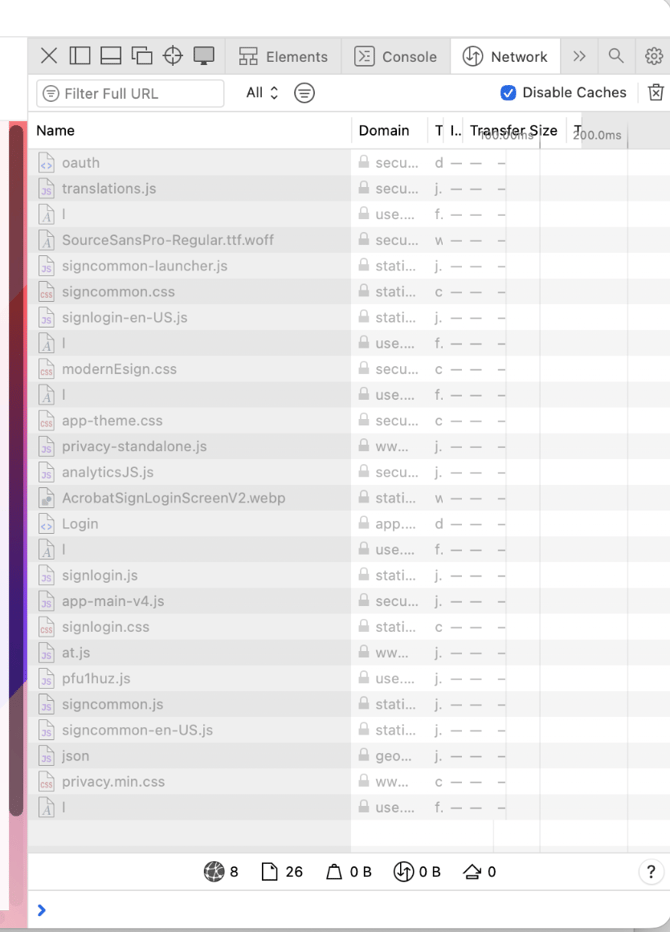
- Select the Network tab and click on Disable cache as shown below
Step 5: Restart
- Close the add-in and then open it again.
- If you are testing or troubleshooting Electronic Signatures, enable the E-Signature checkbox. Then click on Send for signature. When the login dialog appears again, open the Inspect Element and complete the login with your Adobe credentials.
These steps should resolve the issue. If you face additional roadblocks, please contact Decisions Support.