When leveraging AI for generating your Meeting Recap and AI Minutes, Decisions usually auto-fetches the Meeting Transcript for you, allowing you to add it to both processes. However, there are occasions when this automatic process might not succeed. This could be due to various factors, but don't worry - you can still manually upload your meeting transcript to ensure it's included in your AI-generated Recap and AI Minutes. Follow these simple steps to do so:
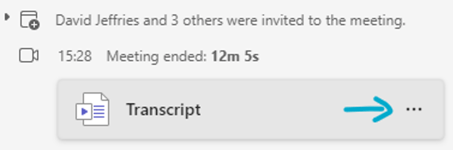
- Locate the Transcript: Navigate to the chat of the transcribed meeting in Microsoft Teams. Find the transcript file.
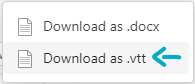
- Download the Transcript: Click on the three dots (more options) next to the transcript and download it as a .vtt file.
- Find the Downloaded File: The transcript will be saved in your computer's 'Downloads' folder.
- Locate your meeting in Decisions: Open the Decisions app and select the relevant meeting in your meeting list.
- Initiate AI Features: Start the Meeting Recap or AI Minutes process.
- Upload the Transcript: In the 'Sources' step, look for the 'Meeting Transcript' section on the left side. Click to upload your .vtt file.
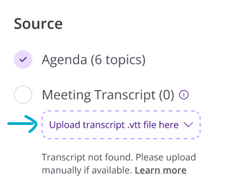
- Select the Transcript File: In the File Explorer, navigate to the 'Downloads' folder and select your transcript file, typically named after your meeting.

- Generate with AI: Once the file is uploaded, you're all set to generate your Meeting Recap and AI Minutes with the included transcript.