How to create an Office 365 Group
To run meetings with Decisions, you need an Office 365 Group for your team. This guide explains how to create a group.
Note that your Office 365 administrator may have blocked user access to create Groups.
- Start by launching your Outlook Desktop or Outlook Web client
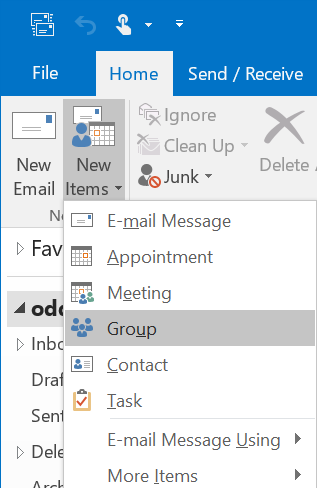
- Click "New Items" and select "Group"

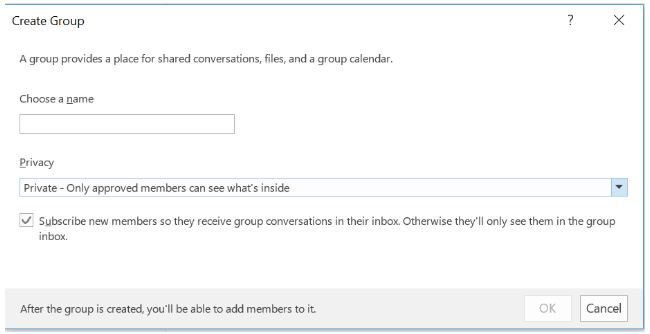
- Give the group a name
- Choose "Private" to ensure only group members can see what's inside
- Select "Subscribe," to make sure members get group conversations and calendar invites in their inbox.

- Click "OK" to create the group
- Add members to the group
You have now successfully created a group. The next step is to create a meeting in this group.