Syncing tasks and decisions with Decisions Meeting Documents Manager for Word
Decisions add-in for Word automatically creates a meeting minutes file in a Word document for easy note-taking and tracking. While writing, it picks up tasks and decisions, and syncs them with Microsoft Planner.
1. Write your task or decision in Word
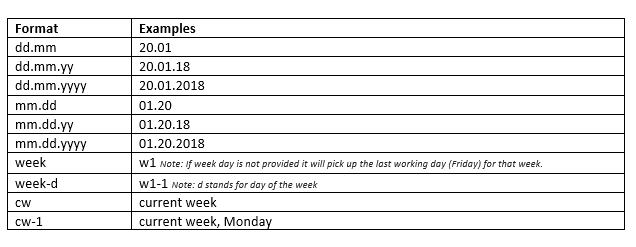
While taking meeting minutes, simply write out a task or decision, using this pattern:Task: action item @name dd.mm.yyyy
Decision: decision
Important note: Additional date formats and synonyms (words) for Task: and Decision: are supported. Scroll to the end of this article to see what is supported and examples.
2. Click “Sync”
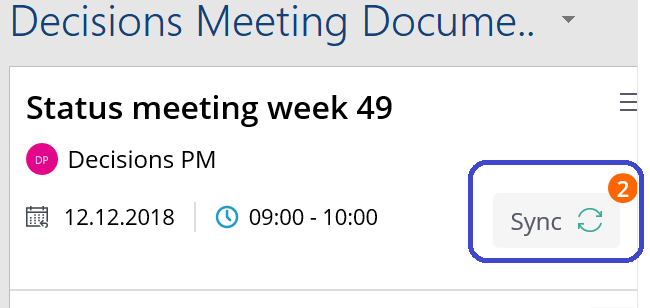
An orange circle will appear in the Decisions add-in, indicating you have one or more tasks or decisions that need to sync to Microsoft Planner.
3. Click “Save”
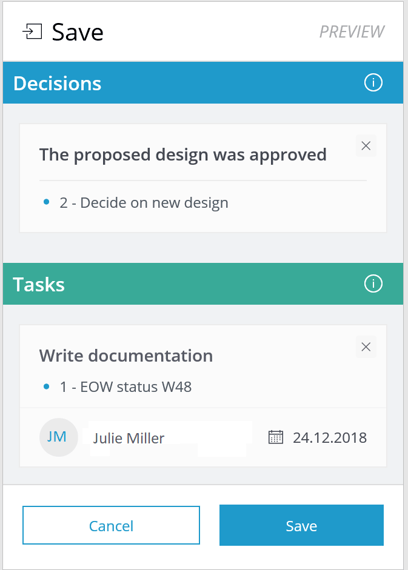 After clicking “Sync,” an overview will be presented. It indicates the tasks and decisions associated with each agenda item.
Click “Save” to complete this step.
NOTE: Once you save your task, you can than insert that task as a highlighted item into your Meeting Minutes
Place your mouse cursor in the location within the MS Word document where you would like the task to be listed and select the "Insert" button underneath the task listed in the Decisions Meeting Document panel on the right hand side.
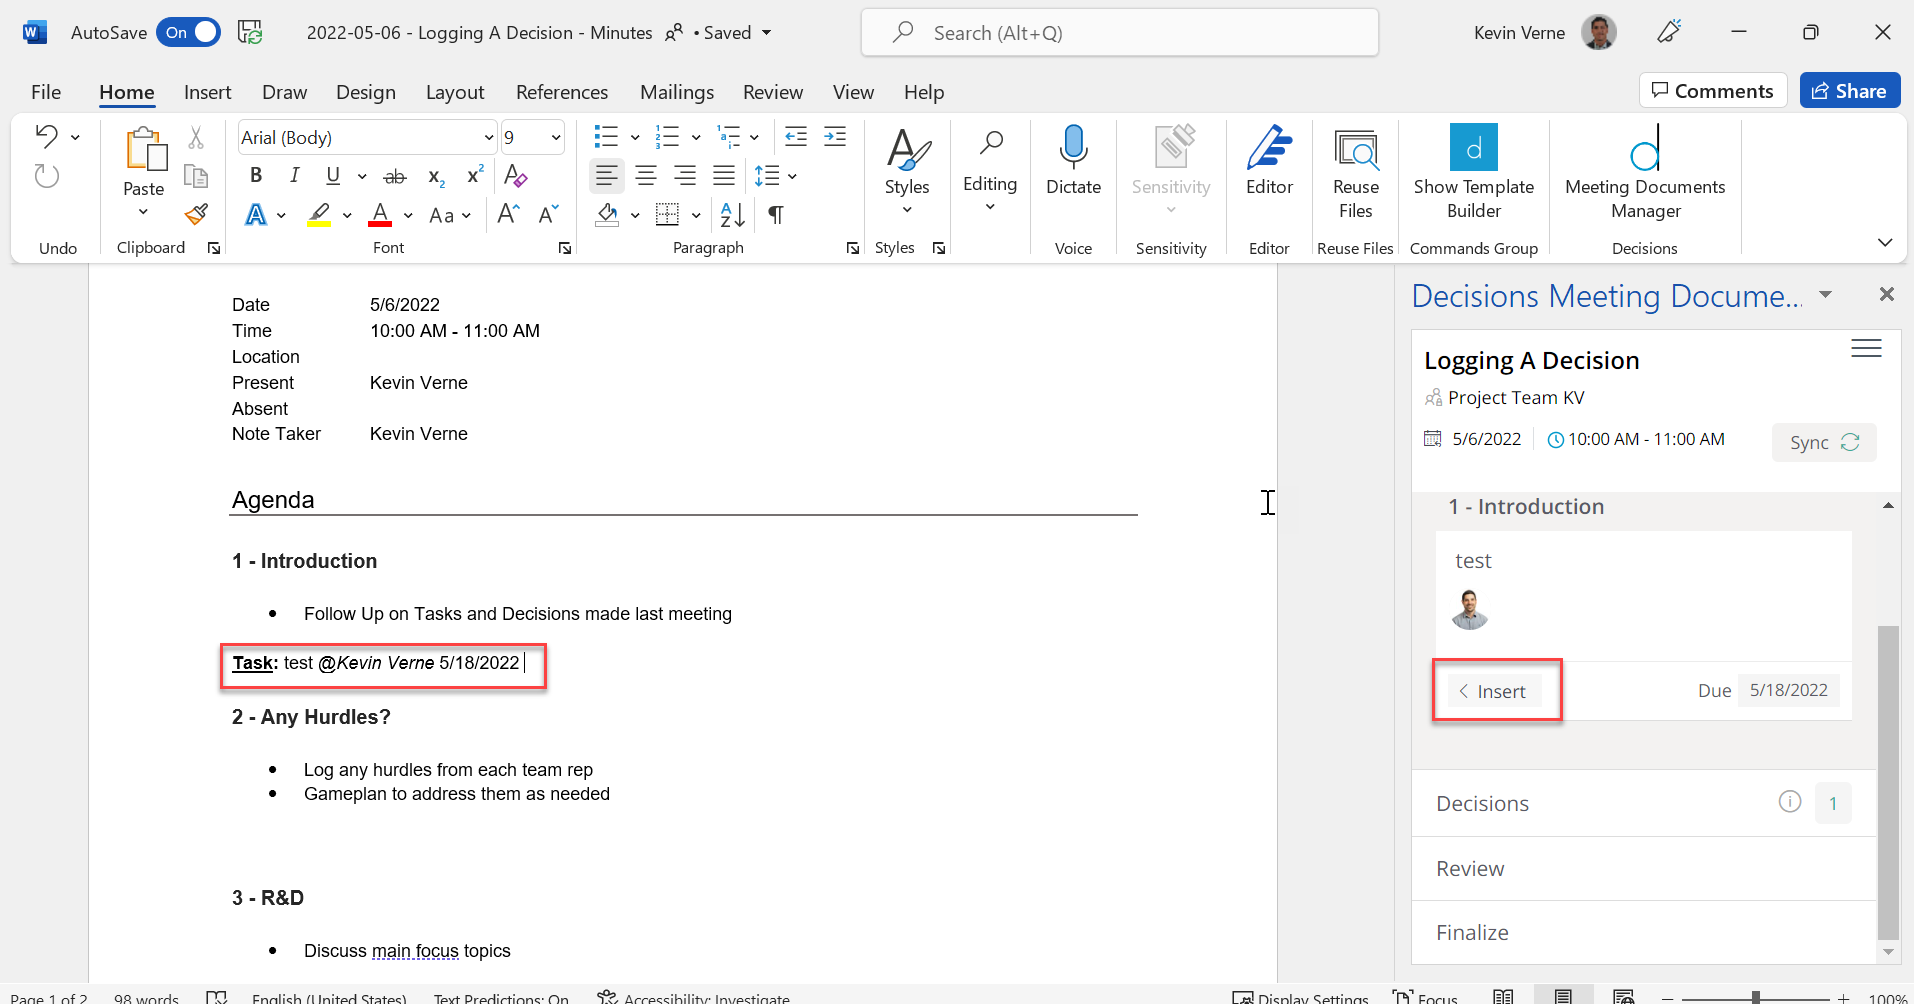
NOTE: This will insert a bolded line item that defines the assigned task
Accepted Date Formats
Synonyms
The following synonyms are supported
English
- Task:
- Action:
- Decision:
- Orientation:
Norwegian
- Oppgave:
- Oppfølging:
- Beslutning:
- Vedtak:
German
- Aufgabe:
- Aktion:
- Entscheidung:
French
- Tâche: (or Tache:)
- Décision: (or Decision:)
Swedish
- Uppgift:
- Beslut:
Dutch
- Taak:
- Besluit:
Examples
The following entry will create a task and assign it to Julie Miller:
Task: Write documentation @Julie MillerTo also assign a deadline, simply add the date:
Task: Write documentation @Julie Miller 11.30.2017
The following entry will create a decision:
Decision: The minutes are approved
In the Word meeting minutes they will appear like this:
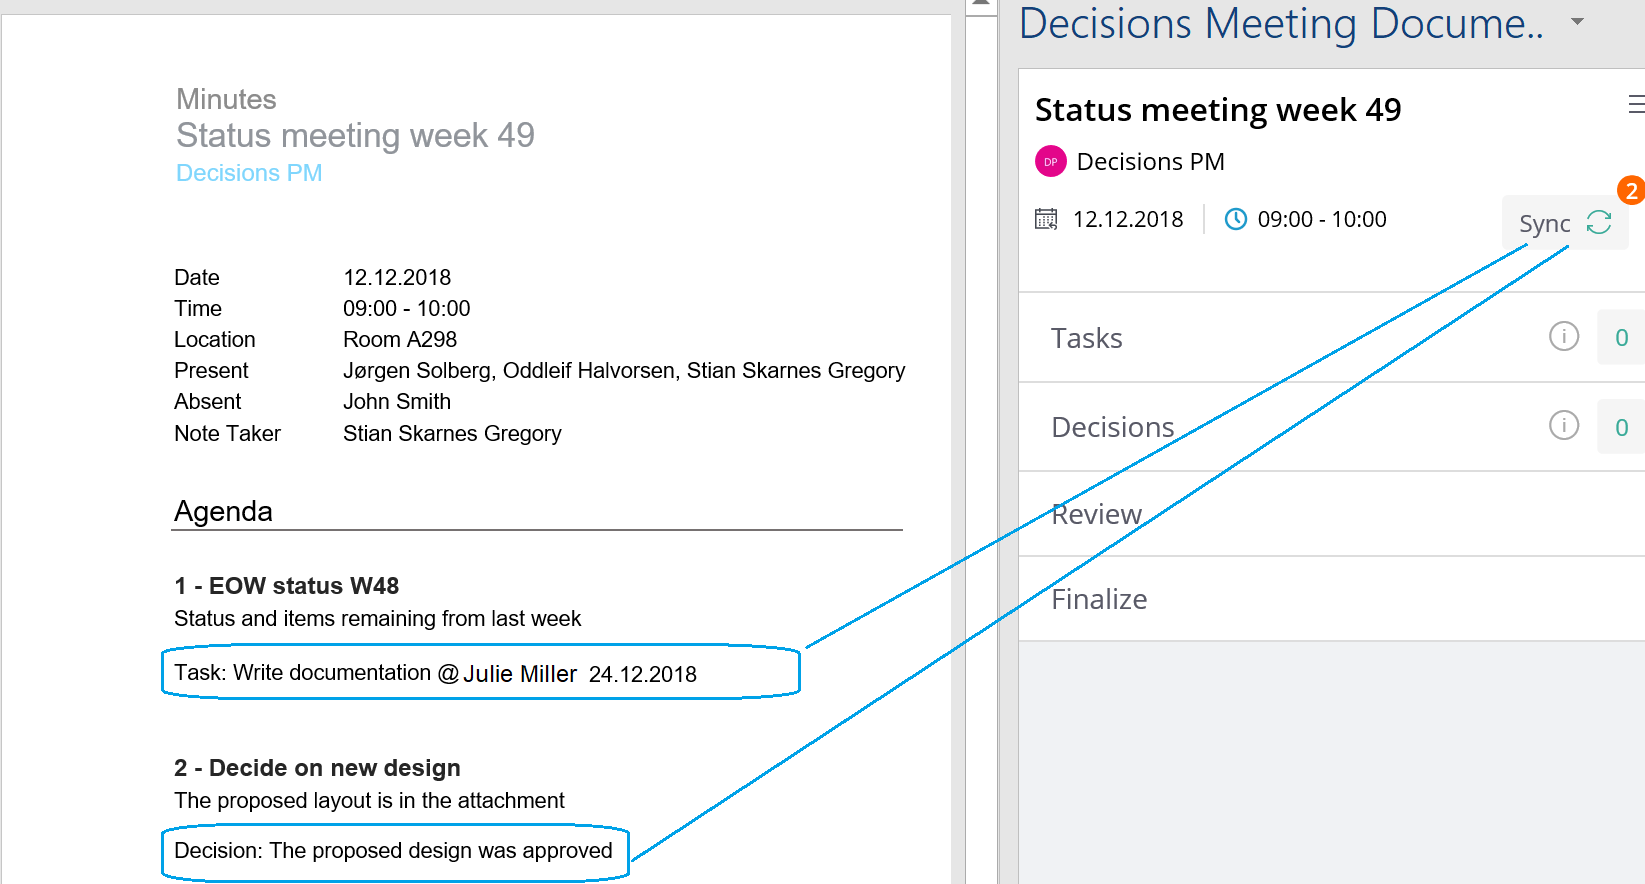
Notice the orange circle; click “Sync,” then “Save” in the next step.
