Before we begin – good to know
Decisions uses Word content controls for merging meeting and agenda information into the document. Some of these content controls are required while most are not. When editing a template, it is easy to inadvertently remove or change these content controls. If, for example, the main agenda content control is removed, then the Decisions side-panel merge option will not work properly.
Word templates (MeetingBook, Minutes and Agenda print) in Decisions
The templates themselves consist of a DOCX file and optionally one or more HTML files. The files are kept in a SharePoint folder associated with a Team. When you create a MeetingBook, Minutes of meeting or an Agenda print; then the template files are copied to the current meeting folder and Word automatically opens. You then use the Decisions Documents Manager side-panel to merge content into the document.
In this guide we will be working only with the DOCX file. If you choose to download and use one of our ready-to-use templates, the ZIP file you download may contain both DOCX and HTML files -> it is still important that you upload/save all the files to the SharePoint template folder.
Location of template files / where to deploy the files
The template files are kept in a SharePoint folder within a Team:
- [Team site]/Documents/Config/Templates/
Follow these steps to locate (and create) the “Templates” folder for a Team:
- Go to https://app.boarddecisions.com/web/#/config
- In the "Select a group" field; Search for the Team where you want to use/test the template
- Click on the Team name
- Click on the link "Click here to open config folder"
- It's located at the bottom
- The templates folder will be created/opened
- This is the folder where you must save the template files.
You can have different templates in different Teams. Or, if you like, it is also possible to deploy a single template to all Teams by following this article.
Obtaining a ready-to-use template
Download and unzip the template that you want to use/customize, then save it into the “config/templates” folder for your Team (as described earlier in this article).
| Description | Preview/example | Download template files |
| Word minutes default | Preview | Download |
| Word minutes option | Preview | Download |
| Word minutes with table layout | Preview | Download |
| MeetingBook default | Preview | Download |
| MeetingBook option | Preview | Download |
| Agenda print default | Preview | Download |
| Agenda print option | Preview | Download |
Important: Do not use an existing empty minutes of meeting, Agenda Print, or MeetingBook document (created from an agenda) as the starting point for customizations. The existing document will contain Word properties that refer to the agenda where is was created from.
Word minutes: The most common content controls
Content controls are used as placeholders. They are replaced with meeting and agenda information and contents when the Decisions side-panel is used to merge data.
You can re-arrange and move the content controls if you like. When doing this, be careful not to modify the contents of the controls (not to accidentally edit them), if you do so, they may not work correctly.
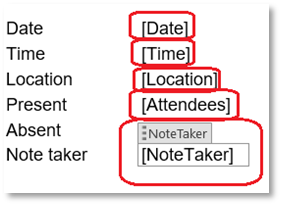
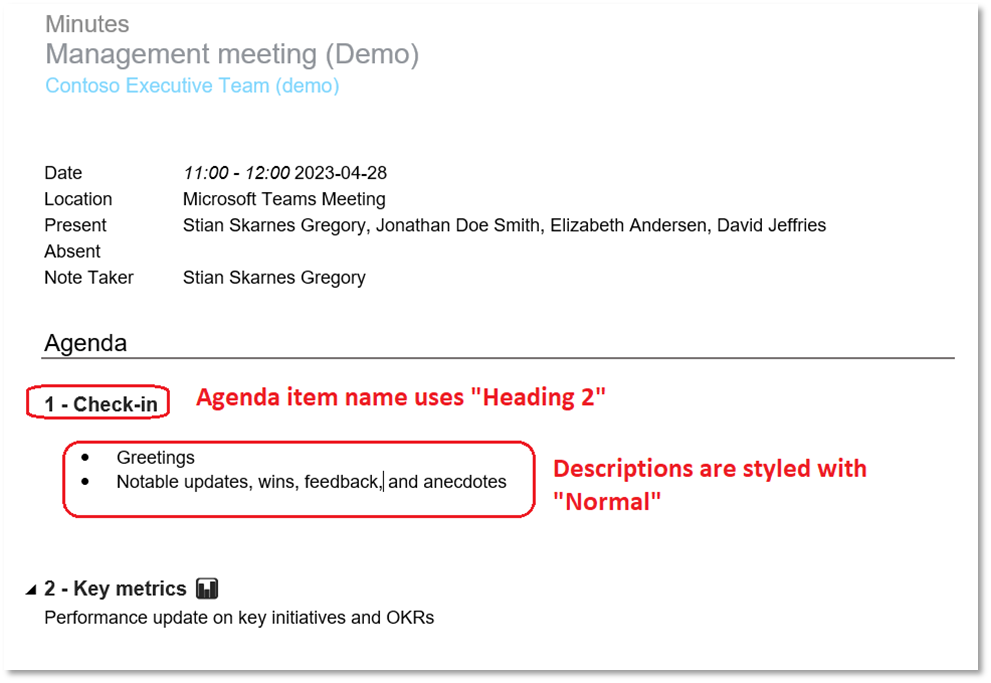
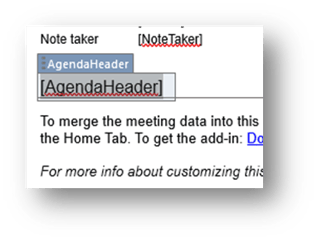
Examples of content controls in the Minutes template:

In the example above: The "NoteTaker" control has been selected.
Most content controls can be removed if you don’t want or need them. However, you cannot remove the main agenda content control (this the big one in the picture above), if you remove it the template will not work.
Types of content controls
Most of the content controls are simple text controls. Some of the content controls are rich text, these include (but not limited to):
- Agenda
- AgendaTable
- AttendeesTable
Here are some examples of simple text controls:
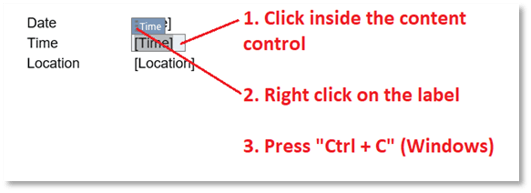
To move/copy a content control
- Select it by left-clicking inside it.
- Right click inside the label that appears above the control.
- Press “Ctrl + C” on your keyboard to copy (Windows) / Or “Ctrl + X” to cut (Windows).
-
- Position the cursor at the location where you want to insert the content control.
- If you are inserting the control close/next to another control, be careful not to accidently edit it (not to click inside and edit the other content)
- Press “Ctrl + V” on your keyboard (Windows)
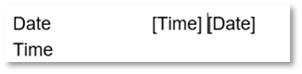
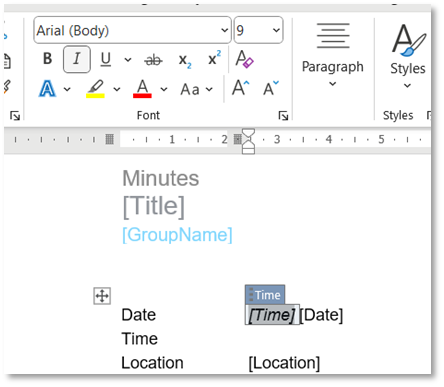
Example above: The “Time” control has been placed in front of the “Date” control.
- Position the cursor at the location where you want to insert the content control.
Deleting a content control
- Select it by left clicking inside it.
- Right click inside the label that appears above the control.
- Press “Delete” on the keyboard.
Styling a simple control
You can change the font, color, and size of a simple content control. Select the control and use the normal styling options available in Word.
Example: Make the “Time” control Italic:
Styling agenda items
The actual agenda items are merged into the document using a rich text control. If you want to change the appearance of agenda item titles and descriptions, you can change the formatting of the following styles in Word:
- “Heading” 2 (H2) for agenda item titles.
- “Normal” for agenda item descriptions.
Example:
If you for example want to change the appearance of agenda item titles, to be blue and use the Verdana font, then you should edit the style called "Heading 2".
- Go to the Styles section in Word.
- Right click on “Heading 2”
- Click “Modify”
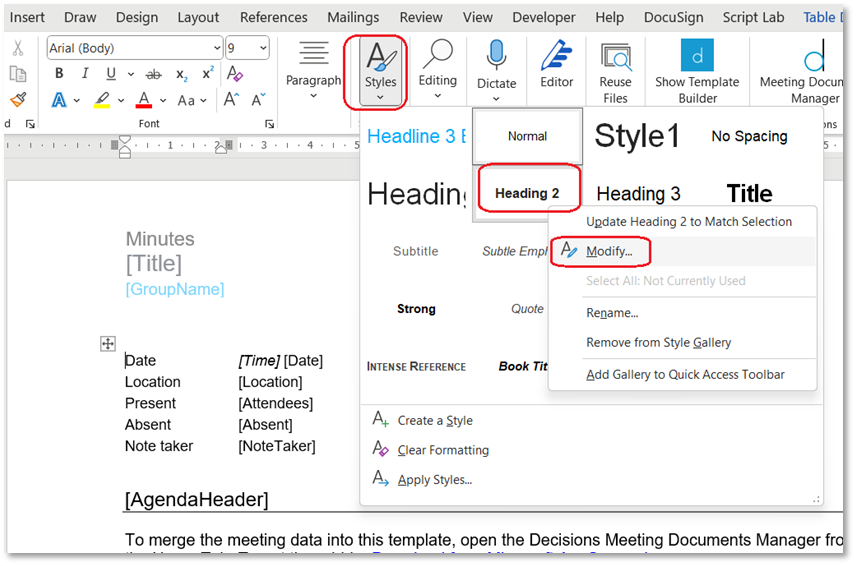
- Then make the required changes to the style. In this example we have set the font to “Verdana”, being blue and 12 points in size.

- Then click “OK”.
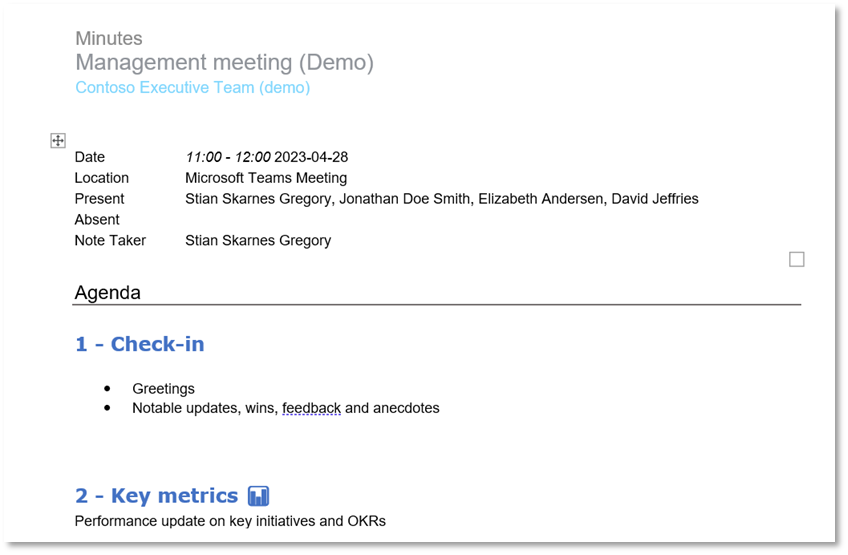
- The next time this template is used for creating minutes, the result will look like this:
Useful info: Agenda item descriptions may contain formatting from the agenda itself, use “clear formatting” on the agenda item in Decisions to remove any formatting from the agenda item.
Working with and testing custom templates
You will be working with and testing the custom template in a Team, so save your template in the SharePoint folder for templates: [Team site]/Documents/Config/Templates/
Create a meeting agenda using Decisions or open an existing agenda. When working with and testing custom templates it is easiest to use Decisions in the web browser (https://app.boarddecisions.com/). If you opt to test with an existing agenda, remember to refresh/reload the agenda in the browser (F5), it will ensure that the most recent template is loaded.
Overview of some frequently used content controls
| Content control name | Description | Simple text / Rich text |
| CompanyName | The name of the current company | Simple |
| GroupName | The name of the current team/group | Simple |
| Title | The title of the meeting (as displayed in calendar) | Simple |
| NoteTaker | The name of the person who merges the data (the current user) | Simple |
| Present | List of people (comma separated) who are present | Simple |
| Absentees | List of people (comma separated) who are absent | Simple |
| Time | Meeting time, from - to (from calendar) | Simple |
| Date | Meeting date (from calendar) | Simple |
| Location | Meeting location (from calendar) | Simple |
| AgendaItems | Contains the agenda items for the current meeting. Used in minutes. |
Rich HTML source: |
| AgendaItemDetail | Contains the agenda items for the current meeting. Used in meetingbook. |
Rich HTML Source: |
| AgendaPrint | Contains the agenda items for the current meeting. Used in meetingbook. |
Rich HTML source: |
Recap; and step by step example - customizing Word minutes
We will change a font, and we will concatenate ‘Date’ and ‘Time’ to a single line.
- Decide what Team you will be using when testing your template.
- Ensure that you have the Decision Document Manager – Word add-in installed.
- Download the Standard Word minutes template (link provided earlier in this article)
- Save the downloaded Word minutes into the Team’s config/templates folder.
- Go to https://app.boarddecisions.com/web/#/config
- Search for the Team.
- Click on the Team name.
- Click on “Click here to open config folder” (SharePoint opens).
- Save/upload the minutes template into this folder.
- Open the Word minutes template from the Team’s config/templates folder.
- Important: Open in Desktop version of Word (not Web version)
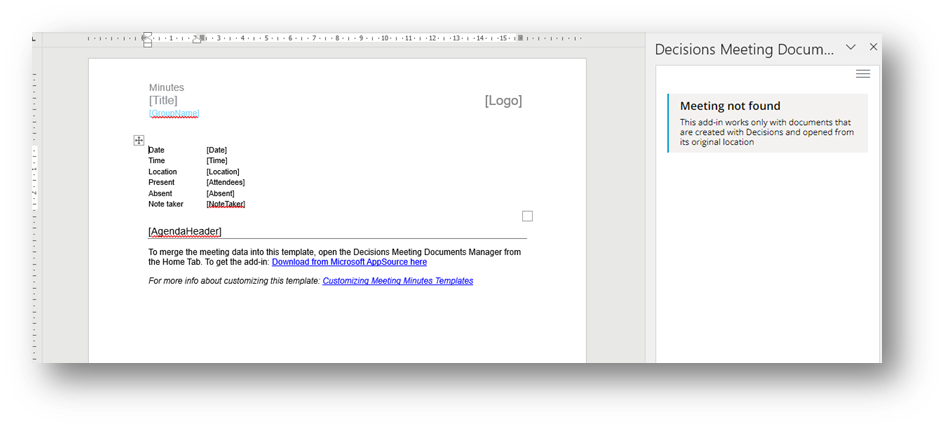
- The default template will look something like this. Don’t worry about the ‘Meeting not found’ message in the side-panel – it is expected.
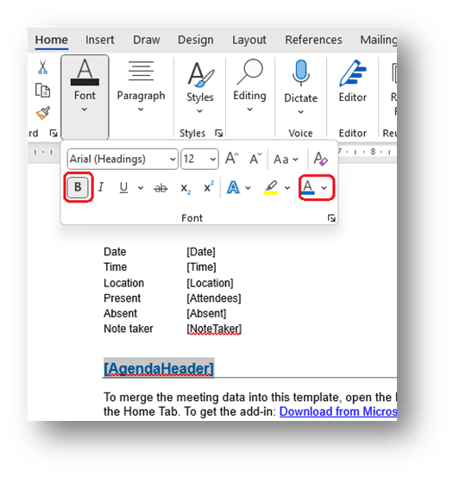
- Select the ‘AgendaHeader’ content control, and change the font color to blue, and make it bold.
- Select:
- Make it blue and bold:
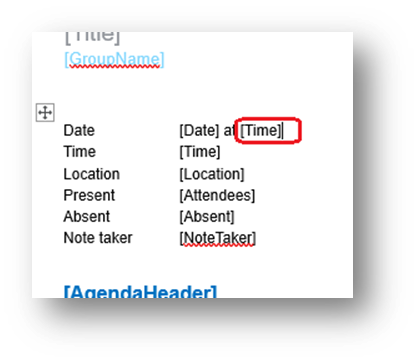
- Select the ‘Time’ content control and copy (Ctrl + C) it to the clipboard
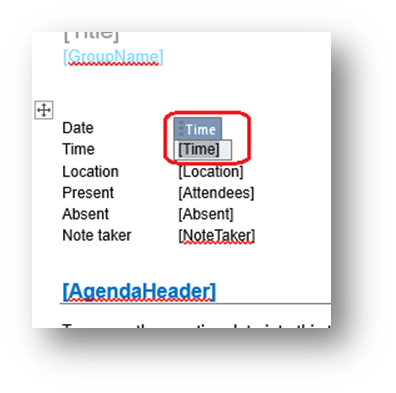
- Select:
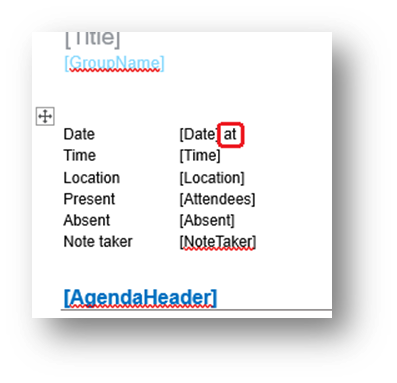
- Position the cursor after the ‘Date’ control and write “ at “.
- Be careful not to edit the contents of the control, you want the cursor position to be after the control. Use the right arrow key on the keyboard to move out of the control if needed.
- Notice space before and after “ at “.
- Paste in the time control from the clipboard (Ctrl + V) - and remove the line break if required.
- Delete the other table row for time.
- Right click somewhere in the row, ‘Delete cells’ – ‘Delete entire row’.
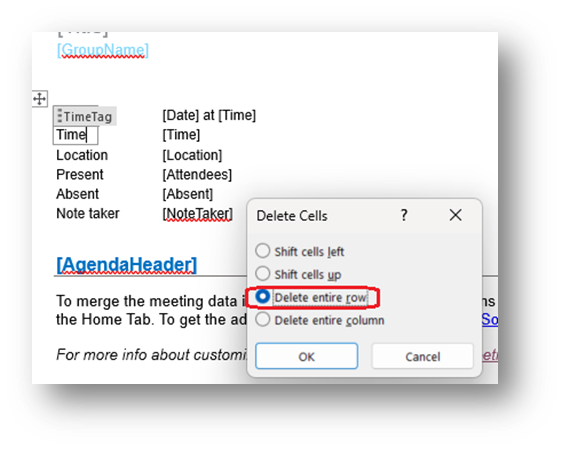
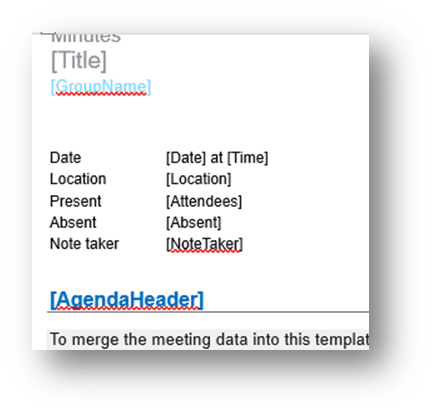
- You should end up with this
- Right click somewhere in the row, ‘Delete cells’ – ‘Delete entire row’.
- Now save the document.
- Optionally: to add your own logo to the template, you can follow the steps in this guide.
- Test the template by creating a new minutes document from the Agenda in decisions - Remember to delete any existing minutes first, and also to refresh the page (F5).